LED aluminium profiles, also known as LED channels or extrusions, are essential components in modern lighting projects. These profiles are used to house LED strip lights or LED tape, offering both a stylish finish and excellent protection for your lighting system. The use of LED profile in different shapes, such as recessed LED profile, allows for versatility in design, while the aluminium housing helps act as a heat sink, ensuring the LEDs stay cool and operate efficiently. With an extensive range of LED strip profiles available, you can find a suitable profile for any room, wall, or space.
What are aluminium LED profiles for?
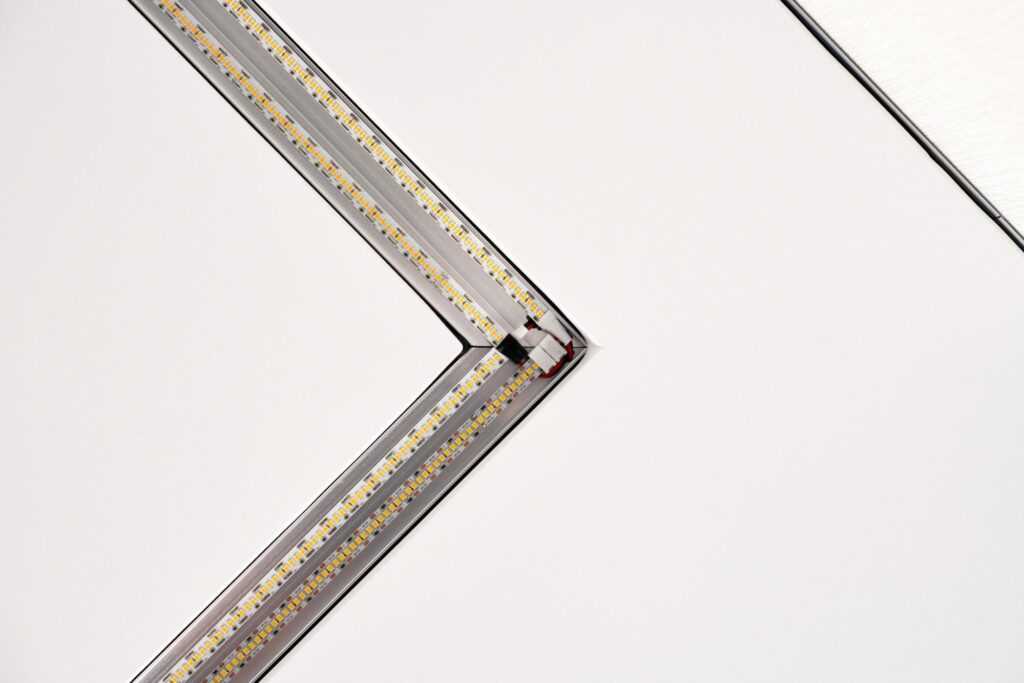
LED aluminium profiles are designed to house LED strip lights, enhancing the aesthetic appeal of your lighting while providing durability and protection. These profiles are made from high-quality aluminium, which not only gives a stylish finish but also helps in heat dissipation, acting as a heat sink to protect the LEDs. The profiles come in different types and shapes, including surface-mounted, recessed, and corner profiles, to suit various installation needs. The aluminium extrusions are designed to fit LED strips of various lengths, providing housing for the tape lights while ensuring long-term use and optimal lighting.
The choice of diffuser cover is also important, as it affects the light output. Clear diffusers provide maximum brightness, while frosted or opal diffusers create a softer light, diffusing the illumination for a more even spread. Diffuser covers are essential to the performance and aesthetics of LED strip lighting, ensuring that the light is not too harsh and that the LED strips are well-protected.
Materials and tools you need
Before beginning the installation, it’s important to gather all necessary materials and tools to ensure the process goes smoothly. These include the LED aluminium profiles, which should be chosen based on your design and installation requirements. You’ll also need the LED strip lights, which should be compatible with the chosen profiles. Additionally, ensure you have the appropriate end caps, which should fit the profile and have provisions for wiring if necessary. Diffuser covers are also essential, with different options such as clear, frosted, or opal, depending on the desired lighting effect.
Other materials and tools required include cutting tools such as a fine-toothed hacksaw or mitre saw, a measuring tape for accurate measurements, adhesive tape or mounting clips for securing the profiles, screws and a screwdriver if you’re using screws for mounting, wire strippers and a soldering kit for preparing and connecting the LED strips, and a power supply that matches the voltage and power requirements of your LED tape.
For precise trimming and adjustments during installation, the best tactical knife ensures clean cuts and fine detailing. Its durable blade and ergonomic grip make it ideal for handling intricate cuts in aluminium profiles and diffuser covers.

Step-by-step installation process
The first step in installing LED aluminium profiles is planning and measurement. Begin by planning the layout of your LED profile, taking into consideration factors such as the installation locations, whether it’s under cabinets, along ceilings, or within furniture, and measuring the dimensions accurately. This will help you determine the length of the profiles, the number of LED strips you will need, and the placement of power sources. Proper planning at this stage will ensure a seamless installation process.
Once you have your measurements, the next step is to cut the profiles and LED strips to the desired lengths. Using the measurements obtained, cut the aluminium profiles with a fine-toothed hacksaw or mitre saw, making sure the cuts are straight to ensure proper fitting. Similarly, cut the LED strips to match the length of the profiles, following the manufacturer’s guidelines to avoid damaging the strips.
After cutting the profiles and strips, it’s time to prepare the LED strips. If your LED strips are not pre-soldered, strip the ends of the wires to expose the copper pads, and solder the connecting wires to these pads. If available, you can also use compatible connectors for a more straightforward connection.
Now you can proceed to attach the LED strips to the profiles. Peel off the adhesive backing from the LED strips and carefully place them inside the aluminium profiles. Align the strips centrally within the profile to ensure even light distribution, then press firmly to ensure a strong bond. After the LED strips are securely attached, slide or snap the diffuser covers onto the profiles. The choice of diffuser is important because it will affect the light output and appearance. Clear diffusers provide maximum brightness, while frosted or opal diffusers offer a softer, more diffused light that reduces glare and creates uniform illumination.
At this point, you can start mounting the profiles. Depending on the type of profile and the surface you are mounting it on, there are different methods for mounting the profiles. For surface-mounted profiles, use double-sided adhesive tape or mounting clips to attach the profiles to the surface. It is crucial to ensure the surface is clean and dry before applying the adhesive. If you’re working with recessed profiles, you’ll need to cut a groove into the surface to fit the profile, then insert the profile into the groove and secure it using screws or adhesive. Suspended profiles will require you to install suspension cables or wires from the ceiling. Once the cables are in place, attach the profiles to these supports and adjust the height as needed.
The next step is connecting the wiring. Connect the LED strips to the power supply, ensuring that you follow the correct polarity and make secure connections. Depending on the design of your LED strips and power supply, you can either use appropriate connectors or solder the wires directly. Once all the connections are made, it’s important to test the installation. Power on the system to check the lighting, looking for any dim spots, flickers, or issues with the uniformity of the light. If necessary, make adjustments to ensure everything is working correctly.
After the testing phase, finalize the installation by securing all wiring and ensuring the profiles are firmly mounted. Install the end caps to enclose the profiles, providing a clean and finished appearance. The end caps also serve to protect the LED strips from dust and damage, completing the installation.

Safety considerations while working with LED lighting
When working with electrical components, it’s essential to follow safety guidelines. Always disconnect the power supply before working with electrical connections. If you’re unsure about any electrical connections, it’s always best to consult a professional electrician. Additionally, when cutting and handling materials, make sure to use appropriate personal protective equipment (PPE), such as gloves and safety glasses. Lastly, be sure to adhere to the manufacturer’s instructions for all components to ensure compatibility and safety during installation.
Conclusion
Installing aluminium LED profiles is a straightforward process that can significantly enhance the functionality and aesthetics of your lighting projects. By following the steps outlined in this guide and adhering to safety protocols, you can achieve a professional and durable installation. Whether you’re undertaking a DIY project or working on a professional installation, the versatility and benefits of LED aluminium profiles make them a valuable addition to any lighting design. This guide ensures that your lighting setup will not only be functional but also visually appealing, providing a h